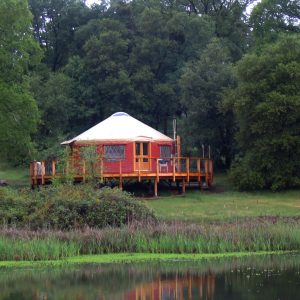
How To Build A Yurt Platform
Every yurt requires a sturdy and precisely-sized platform to support the structure. When it comes to yurt platforms you have several options. While the standard platform rises 6 inches above the ground, some yurt owners opt for raised or concrete yurt platform plans. Building a yurt with a raised platform can allow for more storage or electrical wiring beneath the yurt. On the other hand, a concrete yurt platform is one of the strongest options and ideal for yurt owners trying to utilize in-floor radiant heat.
No matter what kind of yurt platform you’re looking to construct, Pacific Yurts offers the guidance necessary to successfully build a platform you’ll love.
What’s The Difference Between a Deck and a Platform?
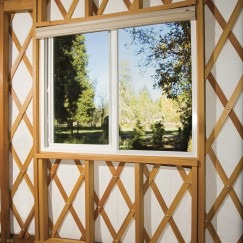
In the early stages of building your own yurt, you may wonder what the differences between a yurt deck and yurt platform are. A typical deck has gaps between the boards to allow water to flow between them and is an exterior structure. A typical yurt platform is similar in construction to a deck, but utilizes tongue and groove boards as the floor surface. This does not allow water or wind to pass through it and is an interior floor structure. Exterior decks can be any shape or size, but the yurt platform needs to be circular, the exact diameter of the yurt, and separated from any exterior decks or walkways.
Preparing Your Yurt Platform
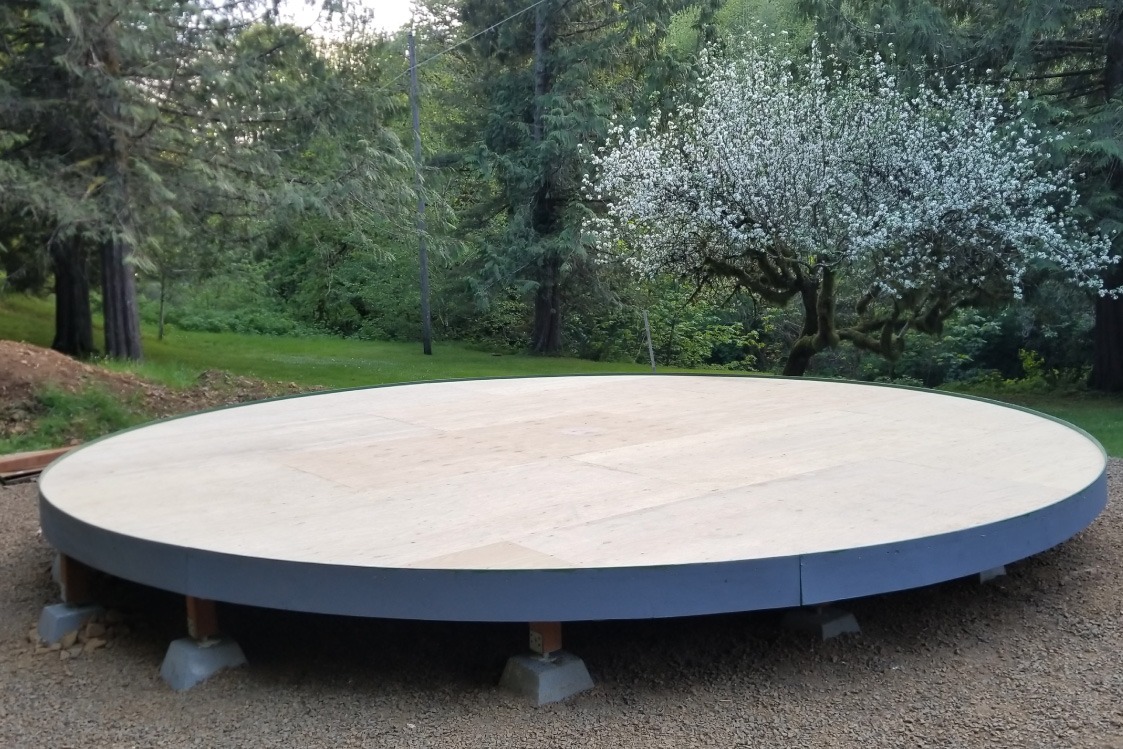
Since a platform is the foundation of a yurt, it’s important that it is constructed carefully and securely. The larger your yurt, the more your raised platform will cost.The platform is the same diameter as the yurt and stands at least 6 inches above the ground. If you want electrical wiring, plumbing, or storage under your yurt, plan to construct the platform at least 18 to 20 inches above ground.
Some yurt owners construct their platform using Structural Insulated Panels (SIPs), which can be purchased from a local supplier to save on shipping costs. These panels can be quite heavy, but they have insulation built in and can save construction time when building the platform. If constructing a concrete yurt platform, a wood or composite sill plate should be fitted around the perimeter so the yurt can be anchored properly using the hardware provided.
How to Build a Yurt Platform
Now that you’ve decided what kind of yurt platform you want, it’s time to walk through a step-by-step process of how to build a yurt platform. To begin, you’ll need a measuring tape, saw, drills, a level, and other tools.
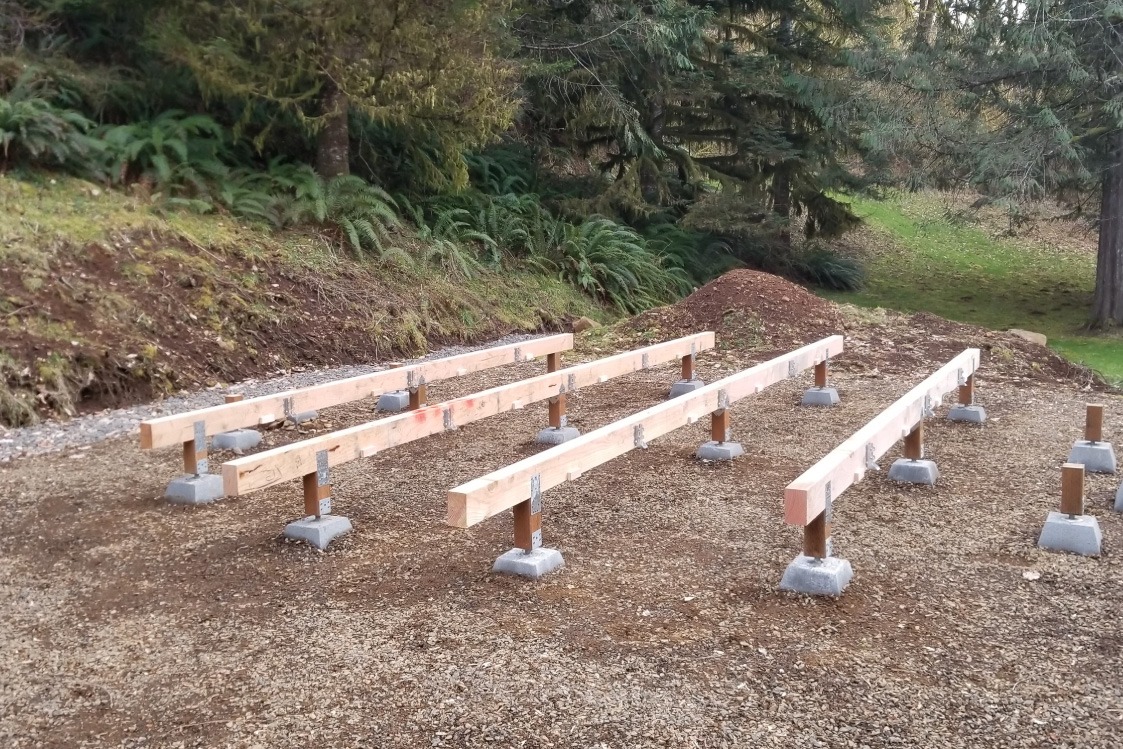
Step 1: Lay the Footings
The first step on any raised or concrete yurt platform is to clear the area of brush or debris where the yurt will sit. Concrete platforms will require the site to be leveled as well. Once this is complete, you will lay the footings. Most raised yurt platforms use concrete footings, which are often poured on site so the footings are below the frostline. The size of your footings and depth they should be installed below grade will vary depending on each individual site, conditions and local building codes.
The key difference between building raised and concrete yurt platforms is how the footing is done. Instead of multiple concrete footings supporting the structure, the entire base is composed of concrete, with the outer perimeter being thicker than the middle of the slab. Concrete is poured into a circular form that is one inch smaller than the diameter of the yurt. A ring of ½” treated plywood will be added around the perimeter of the concrete, enlarging the diameter of the platform to match the yurt’s diameter. Keep in mind that in order to pour a concrete platform, the ground must be flat and a concrete truck must be able to access the space.
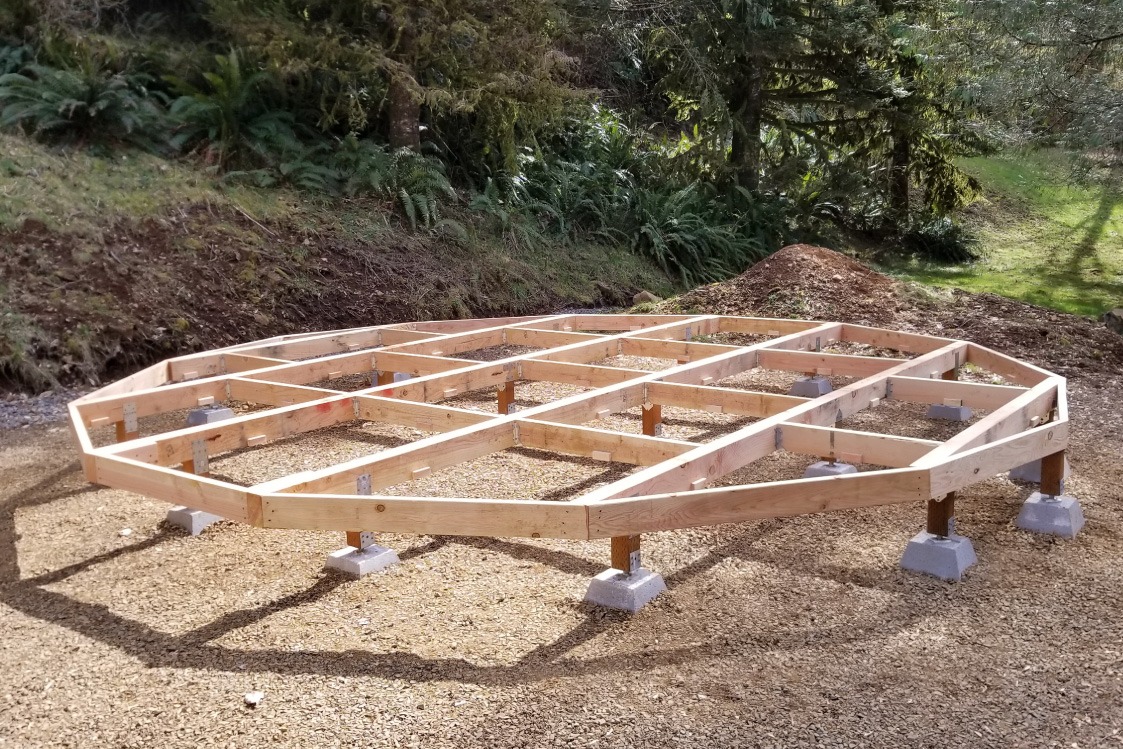
Step 2: Set the Beams and Perimeter Blocking
Now that your footings are in place for a raised yurt platform, it’s time to add the wood beams. These beams are typically leveled using posts that are fastened onto the footings. The size of your posts and beams will be determined by your individual situation and the floor load rating that is needed. The general recommendation for platform framing Pacific Yurts provides is based on a typical residential floor load of 40 pounds per square foot. Once your beams are in place some wood blocking (typically 2×6) should be installed around the perimeter of the frame, making sure nothing extends beyond the radius of the yurt.
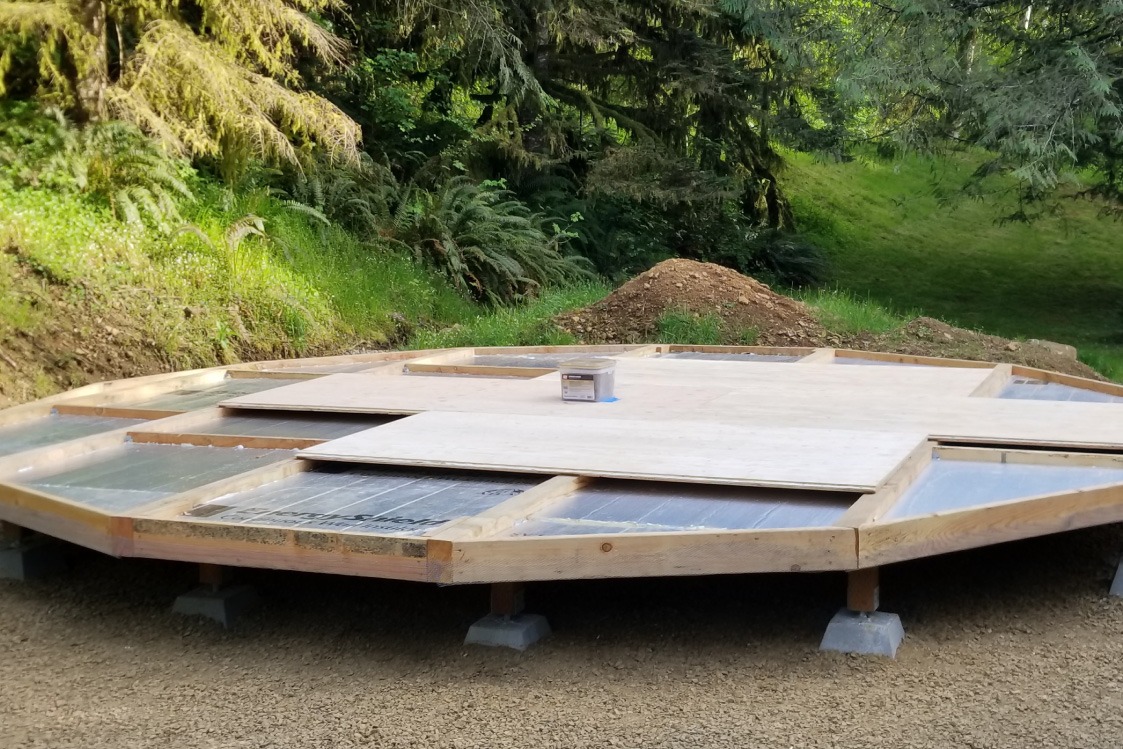
Step 3: Lay the Flooring
As the final step in building your yurt platform, install the flooring. The flooring is typically either 1-⅛” plywood or 2×6 tongue and groove. The 2×6 T&G is typically used when the platform will be the finished floor inside the yurt. The plywood is typically used if you plan to install a ‘finished’ flooring over it, such as hardwood, carpet, or floating floor laminates. If your plan is to add a ‘floating’ floor system you will want to prepare the platform by adding a raised ring around the perimeter. A detailed explanation of this process can be downloaded from the Downloads page of our website. If you plan to add a moisture barrier and insulation into the platform, it would be best to install it before fastening the flooring onto the beams.
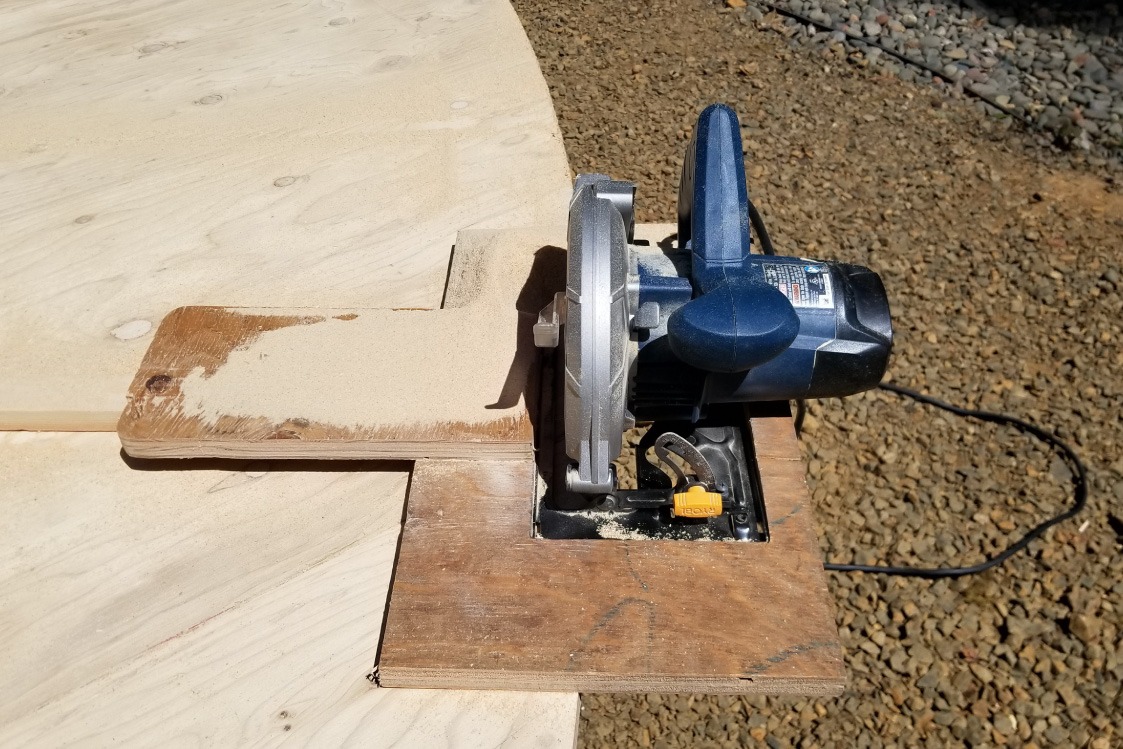
Step 4: Cut the flooring and add a drip edge
Once the flooring has been fastened onto the beams it will need to be cut into a circle with the exact diameter of the yurt. An easy way to get a precisely cut circle is to fasten a board at the center of the platform and onto your saw, to hold the saw at the exact radius as you cut the circle. The drip edge is basically a board that is bent around the perimeter of the circular flooring to contain the lattice wall and provide a secure surface for the bottom of the yurt’s side cover to anchor onto. The drip edge can be made from exterior plywood, PVC sheet material, Hardie Plank (cement fiber-board siding) or other materials, but the thickness should be no less than ⅜” and no more than ½”. The drip edge fastens onto the edge of the platform with one inch extending above the finished floor and it should extend at least 6” below the floor level. It is best to have it wide enough to completely cover the ends of the beams below the flooring. Be sure to paint the drip edge to protect it from the elements.
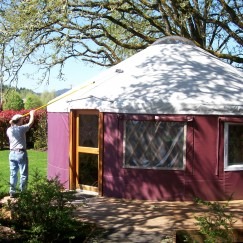
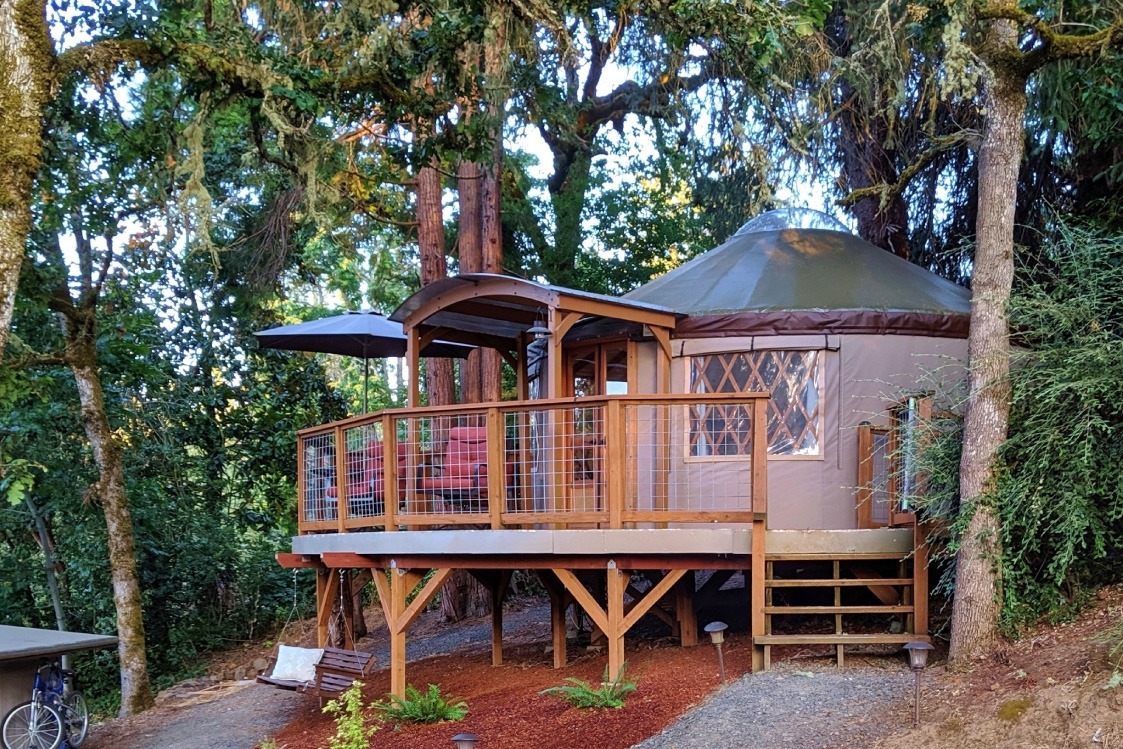
Once your flooring and drip edge are installed, it’s a good time in the yurt building process to consider a porch cover for your deck. A yurt porch cover provides an area for outdoor enjoyment and coverage from the elements for your door and entry.
Yurt Platform Resources
Pacific Yurts has a number of Adobe™ PDF™ Yurt Platform schematics that offer more insights into yurt platforms and how they are constructed. Below is a sampling of the three types of suggested platform plans we offer:
Browse All of Our Downloadables
Platform Plans – Raised Platform
Platforms On Existing Decks
Concrete Platform Plans
Choose Your Pacific Yurt Platform Plan
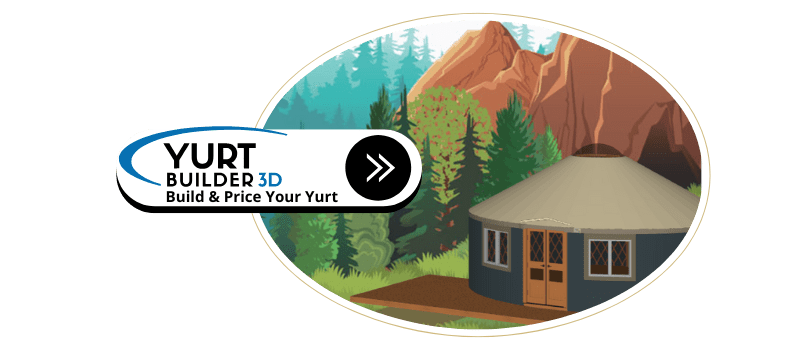
Selecting your yurt platform is a personalized choice based on your plans for the yurt. Explore our virtual 3D yurt builder to design your yurt vision. You can also contact Pacific Yurts directly to learn more about yurt platform material and installation options.